
Part II
~Through the Mountain Pass~
We've taken our first step out of town and our adventure has begun! And we take, like, one more step and it's RANDOM BATTLE TIME!
The encounter rate in this game is very high so it's not uncommon at all to get into battle with a single step. And yeah, this can happen many times in a row. Thankfully the run rate is kinda high, too. Maybe it's even 100%, other than the battles that you are forced to not run from, like scripted battles and such.
Anyway, let's learn about the battle system, yay!
Even this far back, we can see the beginnings of some staple features of battle that we're still seeing in the newer SaGa games today, so if you're also reading the UNLIMITED:Saga Play Diary or the SCARLET GRACE Play Diary, you will already be familiar with a bit of these concepts.
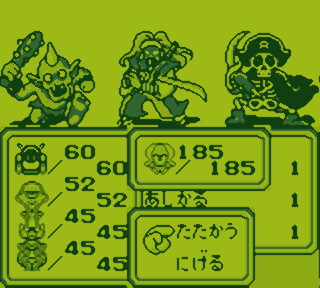
Enemies appear on the screen similar to Dragon Quest style, where our view is simply the enemies from the front. We never see our characters in battle outside of their little icons in the menu when we're selecting actions. At the beginning of a round of combat, we're given two options: to fight or to run. If we choose run, of course, we run away, but if we choose fight, then we proceed to choose an action for each character in the party, and then a round of combat begins where all party members and enemy party members take turns doing their selected actions after an initiative roll.
On each character's turn, you can choose between any of their equipped items or skills that have battle actions. Like in Romancing SaGa 3 and other titles, items must also be equipped to be used in battle, so if you want to use a potion during a fight, you have to have somoene equipped with some.
So, again, there's no general "attack" command, and you can equip multiple weapons at once so you can choose different ones on different turns if you'd like.
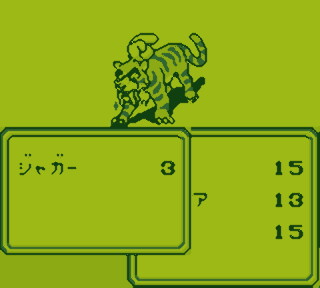
Enemies can also come in "stacks," or groups of the same type of enemy. In this screenshot, there are actually three Jaguars, even though it's only represented by a single image. Only three images can "fit" on the screen at once, but with stacks, you can have tons of enemies in a single battle.
You choose your target for each character at the beginning of battle, and each weapon and skill has a certain targeting type. Most basic weapons and skills target a single enemy. If a stack is selected, it will hit the enemy in 'front' of the stack. Some actions can target all enemies at the front of all the stacks, or can target all enemies within a single stack. And similarly to the older Final Fantasy titles, if a target enemy dies in battle before a character's action, the character will just do nothing because they have no target, rather than automatically targeting a random other enemy or anything like that. Entire stacks are at least targeted at once, so if you're targeting the Jaguars and someone kills the front Jaguar, you'll just attack the new front Jaguar when your turn in combat rolls around.
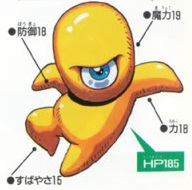
Characters have five main stats used in battle: HP, Strength, Defense, Speed, and Magic Power. HP is just like any other game -- when it reaches 0, the character is incapacitated and can only return to battle by being revived. Defense modifies the HP damage taken by most attacks. Speed helps in determining the order actions are taken in a round of combat. Individual weapons and skills all have their own damage formulae which can use Strength, Speed, and/or Magic Power.
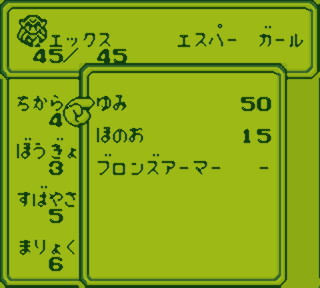
In the status screen above, we can see X has an HP of 45, Strength of 4, Defense of 3, Speed of 5, and Magic Power of 6.
The big box in the center of the screen is the currently equipped items and skills. All characters have eight slots for equipped items and skills, but how exactly they are utilized and available changes by the class of the character. Humans simply are able to use all of their 8 equipment slots normally, but they don't get any kind of special skills or abilities, so you have to rely solely on items you find or buy. Items that can be used in battle have a durability count, so you have to constantly buy new items to replace your broken ones, as there's no way to repair equipped items.
X is an Esper Girl, which means she also can equip up to eight items, but she'll also randomly learn special Esper Arts at the end of battle, which take up a slot. Esper Arts are not items, so their "durability" can be restored by resting at an inn. Espers can have up to four Esper Arts at one time. If an Esper learns a new Art at the end of a battle and they already have four Esper Arts or if their 8 equipment slots are already full, one of the old Esper Arts will be deleted and replaced with the new one (it will always be the lowest one on the equip list, so you can control at least which one is the next to go).
Because of this system of growth, Espers' equipment needs to be managed more tightly. While it's perfectly possible to use an Esper filled up with regular equipment, their growth in stats like Speed and Strength are much slower than humans, and you'll miss out on a lot of their most useful Esper Arts.
X starts the game with a Bow that has 50 durability, the Flame Esper Art with 15 charges, and a Bronze Armor. Armor doesn't grant any available actiosn in battle, but it is the only thing that raises defense.
Bows have a set base damage depending on the type of bow they are, and they use Speed to calculate their accuracy. Bows can be powerful when their base damage is stronger than the calculated damage of other weapons due to low stats, but as your stats grow, a bow's usefulness will wane.
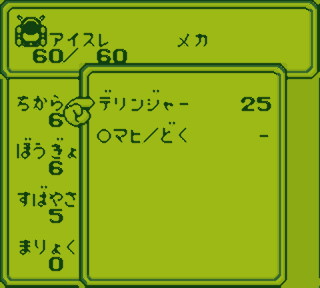
Our friendly Mech IceLaic starts with a Derringer equipped that has 25 durability. Guns are similar to bows in that they have set base damage based on their type, but they're a little more complex. In addition to their base damage, they deal an additional amount of random damage, and their accuracy is based on the user's Strength rather than Speed. Mech's also have an inherent bonus that doubles the amount of random damage added to the base damage and doubles their accuracy with guns.
If you remember from the last entry, I talked about how Mechs also modify their equipment to become part of their body. So this Derringer is now technically a body part for IceLaic, rather than just a piece of equipment she holds. When sleeping at an inn, Mechs not only restore their HP but repair their parts as well, which will restore all 25 durability on the Derringer.
Also unlike Humans and Espers, Mechs' stats are based on their current equipment. When installing a Derringer to a Mech, their Strength is increased by 6. So a Mech's stats will always just be a sum of their parts, which means they can also lower their own stats by removing their equipment or replacing it with others. This gives Mechs a huge advantage early in the game because you can dump tons of equipment on them right away and have significantly higher stats than the other party members.
In addition to the Derringer, IceLaic also has the O-Paralysis/Poison ability, which grants immunity to Poison and Paralysis status effects. This is an innate ability of all Mechs and it cannot be unequipped or overridden, giving only seven equip slots to work with for Mechs. Along with this, both the battle use and the stat changes must be taken into account when choosing equipment for a Mech, making the choices more difficult than equipment for a Human or Esper.
And then we come to our Monsters. At least as far as worrying about equipment, Monsters are the most simple of all of the classes. They have set abilities based on their species and cannot be equipped or unequipped with any items at all.
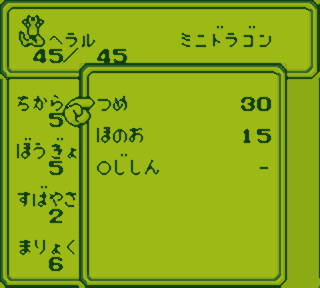
Farel is a Mini-Dragon, which means he has the Claw attack with 30 uses, the Flame ability with 15 uses, and an immunity to Earthquakes.
Flame is the same ability that X has as her Esper Art, actually, and it targets all stacks and does damage based on the user's Magic Power.
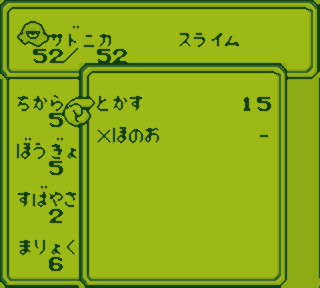
Sardonica comes with the Dissolve ability with 15 uses. She also has, sadly, a weakness to Flame attacks, which is an innate part of her skills as a Slime species.
Dissolve is a great ability, though. It attacks an enemy and heals the user at the same time, so Sardonica is able to leech HP from enemies. In the beginning of the game when healing items and abilities are uncommon, this can be very helpful.
Since we can't equip them with anything, we do have to pay mind to monsters' skill durability. If it runs out completely, they'll just be worthless for a while. But their durability will be completely restored when staying at an inn. Even still, it's more limited than the other characters, so we have to think about our actions in battle.
Throughout the game, monsters will change their species which gives them different stats and abilities. When the species changes, we also start with fresh HP and durability on all our skills, so we can use this in a pinch if our monster is dying or out of skills but we need to carry on. We'll see more of that in a bit.
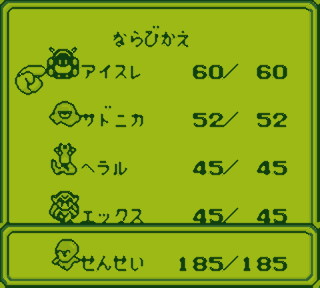
The order the party stands determines how often they'll be attacked by enemies. Enemies are much more likely to attack party members that are higher on the party list. We can't change Teacher's position, but we can rearrange the order of our main party members. Looking at the stats we started with, it seems X has the lowest combination of HP and Defense, so it's actually better to move her to the back for now. Because of the status immunity and easily-increased stats for now, IceLaic makes the best to put in the front of the formation. Sardonica's Dissolve ability and slightly higher HP makes for a good second position, with Farel getting the third position solely for being a little more bulky than X.
We also check our Spirit Mirror, which tells us there are 6 more Relics in this world.

Teacher tells us we should start our search by heading to the town to the north, which requires us to walk across a pass to get past the mountain range dividing the two towns. The mountain pass serves as our first dungeon. And you may notice IceLaic is now the sprite we use on the map while walking, because she's the first in the party order.
The mountain pass is pretty small and straightforward. We're introduced to things like treasure chests and stairways and things, so we can get a feel for how the game plays. In the treasure chests, we find four Potions and a Bronze Shield. Shields aren't just generic armor items, but rather are battle action items. Characters don't have a default "defend" option available to them, so if you want to defend in battle, you'll have to use a shield. And different shields can grant different abilities while defending, like the ability to guard party members or immunity to certain types of attacks. The Bronze Shield just functions as a basic defense command, though, which will negate incoming damage.
We give the Potions to X to hold for now, and IceLaic gets the Bronze Shield because it raises her defense even more.
Battles are pretty easy at this point. Teacher has ridiculously high stats compared to the rest of the party, and has a variety of useful skills that can defeat many enemies at once. A lot of battles end as soon as they begin because Teacher defeats the entire monster party at once. And even when they don't, IceLaic's incredible early-game defense and HP make most monster attacks to little to no damage at all. In the rare case that a monster gets a hit in on Sardonica, she can make it up with Dissolve or we can just use Teacher's Cure ability or one of our Potions.
While there is a chance that Farel or X could be attacked, we're defeating the monsters so quickly that this never even ends up happening through the entire mountain pass.
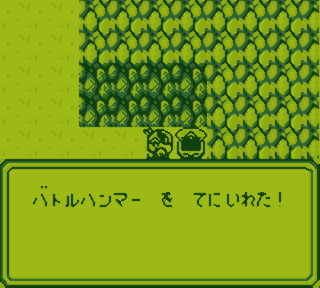
We find a few more treasure chests that contain a Bow and a Battle Hammer. The Battle Hammer increases IceLaic's strength when installed, which increases her accuracy with the Derringer. Right now, the Derringer is the strongest weapon we have, since Mechs get the attack bonus and guns' base damage is pretty high to start with. We can also use the Battle Hammer to attack when we're not wanting to use up the Derringer's durability.
The Battle Hammer originally had 50 durability, but installing it to IceLaic cut that in half, so now it's only at 25. But I'm more than fine with half of the durability of installed items being taken away at first if it means we can restore the durability simply by going to an inn.
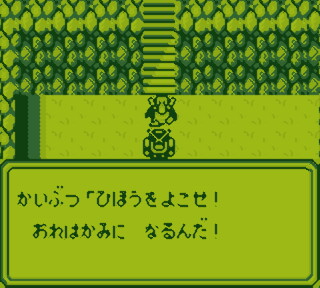
At the end of the mountain pass, there's a monster blocking the exit. It tells us to hand over our Relic, because it wants to become a god.
And so we hand it over and go home. That's the end of the game!
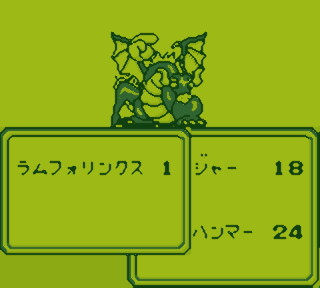
Just kidding, of course. We're gonna fight. This thing is called Rhamphorhynchus. DO NOT ask me to spell that again. In the English version this was just called like... Dragon or Wyvern or something. But of course we had to pull out the ol' encyclopedia for Japanese SaGa like always, lol.
I wish I could say more about this as our first boss battle, but Teacher takes it out in one hit easily. It doesn't even get a turn.
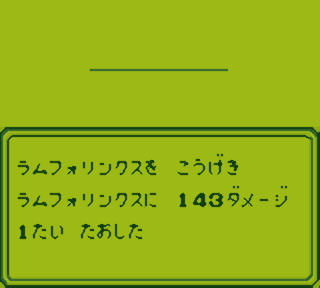
I guess I can show you what it looks like when enemies die...? They kind of collapse into a single line that disappears. It reminds me of turning off an old CRT TV.
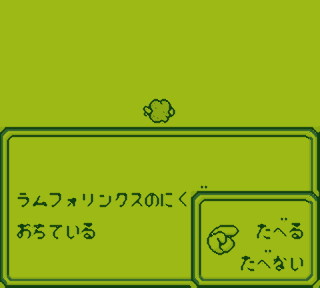
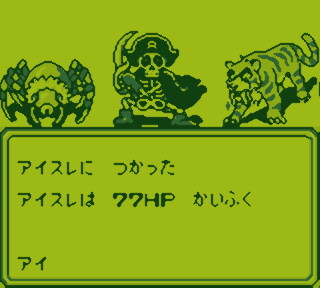
At the end of some battles (this has been happening the whole time so far), you'll find the meat of a monster you killed lying on the ground. Then the game asks you if you want to eat it! Yup, just... eat the random gore off the dirt.
Trying to have X or IceLaic eat the meat will prove futile, but we can have Sardonica or Farel eat it, which will cause them to change into a new species of monster! We could have done this with the other random meats we've found so far, too, but I didn't want to risk turning into a super worthless monster species right away. Slimes are my favorite of the three starting monsters, so I've eaten the Rhamphorhynchus's meat (I TOLD YOU NOT TO MAKE ME SPELL THAT AGAIN) with a Slime many times before and already know what will happen, so we're going to do that! Because I like the result.
I guess I should explain how monster mutation works. Ready for some convoluted game mechanics? None of this is actually explained in the game -- it seems random, but you'll also notice that every combination always yields the same result, because there's actually a pattern there.
The monsters we fight in battle and the monsters we can have in the party are the same. We will indeed fight Slimes and Mini-Dragons at some point, too. There are a total of 180 different monster species in the game that our party monsters can mutate into by eating meat. That's more than the original Pokemon, hehehe. Though each species is not nearly as developed as individual Pokemon species are. But that means any monsters we see in battle except for special monsters or non-monster enemies (like human we may fight) are possible monsters for our party!
Monsters can be divided into 36 different genera, with each genus containing five species each. So for example, Sardonica is a Slime, part of the Slime genus. There are four other species in the Slime genus, each one more powerful than the last. Generally each species in a genus are just more powerful versions of the last.
Each genus is numbered from 0 to 35. The Slime genus happens to be genus #6. Whenever a monster eats a meat, it will transform into a new species based on the meat it eats. Each genus also has a certain 'bump rate' at which you'll move along the list when eating it. Rhammy (I am not spelling it again lol), a member of the Wyvern genus, has a 'bump rate' of 6, which means we move up the genus list 6 times. Since Slime was genus #6, so that means if we eat any Wyvern genus meat, we'll become genus #12. Bump rates can be a little more complicated than this, but we won't go into that right now.
Genus #12 is the Mollusk genus, so when eating Rhammy's meat, a Slime will turn into some kind of mollusk monster. Like I said before, there are five different species within each genus, though. Which species exactly we turn into is determined by a Monster Rank. Each individual species has its own Monster Rank, and upon eating a meat, the game compares the Monster Rank of either your monster or the monster you're eating (whichever is highest) to the five monster species within the genus you're turning into. You'll can't turn into a species that has a higher monster rank than you, so you'll become whatever the highest ranking monster is in that genus that has the same or lower Monster Rank compared to you or your food. If you don't meet the requirements for any monster in the new genus, you'll just become the lowest-ranking monster in that genus anyway.
So in this example, Sardonica has a Monster Rank of 1, and the Rhammy has a Monster Rank of 2. This means the highest Monster Rank our resulting monster can have is 2, since that's the highest Monster Rank between Sardonica and her food. In the Mollusk genus, the first species is the Dancing Squid, which is Rank 2. The second species in the Mollusk genus is the Sea Hare, which is Rank 3. We don't have enough to reach Rank 3, so we'll end up becoming the Dancing Squid. Though if we had eaten a cousin species in the Wyvern genus instead of Rhammy itself, or if Sardonica was a different species of monster in the Slime genus, we may have been able to become a higher-ranked Mollusk like the Sea Hare.
As you progress through the game, you'll encounter monsters with higher Monster Rank, so your likelihood of turning into higher-ranked monsters increases. The fourth and fifth species in every genus have Monster Ranks of 10 and 11 respectively, which no species below the fourth have, so once you reach those later tiers, you'll never fall down in Monster Rank.
None of this information is required to play or enjoy the game. But it's interesting to note that while it seems fairly random, the system that determines which monster you become when eating meat is not random at all and follows a set pattern. And if you pay attention, you'll at least notice that certain genera turn into other specific genera based on which meat they eat. If you're really set on having a specific species of monster, you can use this information to choose which meats you eat wisely to get yourself to that point. You can also avoid things like having your current Monster Rank drop -- for example, if you're a Rank 3 monster and eat a Rank 4 meat, but the genus you're turning into has a first species at Rank 1 and a second species at Rank 5, you won't meet the requirements to become the Rank 5 species and will have to become the Rank 1 species instead! This can be pretty frustrating, so knowing the mechanics and having a chart of all the monsters can be helpful if you're wanting to avoid that.
Outside of for the sake of writing up this explanation and example, though, I'm not going to be using much in the way of guides or help for the game. At least, I'm not planning on it -- it's been a long time since I've played and this might be a pretty challenging party to continue through the whole game, so we'll see. If I really need to look up monster charts later, I might. But I'll try to go without it. I will be referencing a few data lists for things like damage formulae of various items and stuff, though, so I can talk about them.
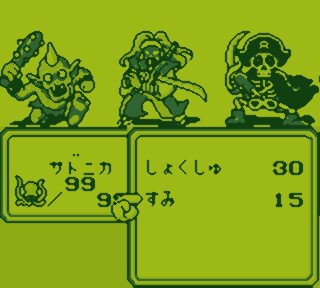
So, uh, due to ALL OF THAT STUFF I SAID, Sardonica has become a Dancing Squid! Sadly you don't get to carry over anything from species to species, so we lose the cool Dissolve ability that she had as a Slime. But in its place, she gets a nice bump up in stats with a new max HP of 99. Her basic attack is now Tentacle, which is pretty strong for the party at this point. She also has a new ability called Ink, which targets an entire stack of monsters and can possibly Blind all of them! The success rate isn't the best, but it's still worth trying on large groups that may take many turns to defeat.
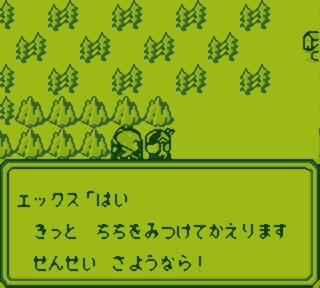
When we come out the other side, we say goodbye to Teacher. He's gotta... go back to town. Actually it doesn't really explain why he's leaving, as there were only four houses in town and all the children are in our party now, so he has no one to teach, but...
Before letting him go, though, I guess I should show you his art. I meant to do this when I introduced him. He's super cute. He's become kind of a mascot of the original SaGa trilogy, too.
We say our goodbyes, and now we're off to search for Dad on our own. Without the overpowered Teacher in the party, the real game begins here, and battles suddenly become a lot more challenging and thoughtful.